

Valentine One Gen 2 - Powered RAD MAG Mount
Powered - Full Hardware Kit / 12V Wire / Ground Loop
$115.00
Sale price
$115.00
Regular price
$169.00
Skip to product information

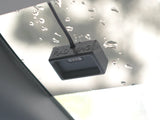 Powered receiver
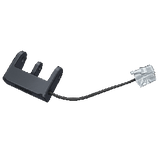 Detector Mount
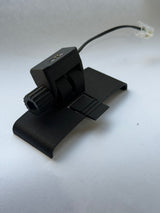 Valentine One Mount
 Prep Wipe


Valentine One Gen 2 - Powered RAD MAG Mount
$115.00
Sale price
$115.00
Regular price
$169.00
- Purpose-built for the Gen 2 - a completely new design, not a Gen 1 retrofit
- One snap: docked, powered, and detecting in under a second
- Power runs through the mount - no cables between you and the windscreen
Whats Included
Everything to mount and power your detector


What you’ll get
Hardwire kit - 3 m cable with soldered ground loop and stripped 12V lead, made for fuse taps.

One detector, two carsTick the offer below to add a discounted second receiver. Mount it in your other car and swap your detector over in seconds.
Product Highlights
Compatibility
What's Included
What You Need
2-Pin vs 4-Pin
Important: 2-Pin and 4-Pin systems are not cross-compatible. Your detector, mount, and power cable must all use the same pin configuration.
- 2-Pin (Power Only): Your detector functions as it does today. All functions on the detector work. No remote mute switch.
- 4-Pin (Power + Mute/Alert/Data): Allows you to use a remote mute hardwire kit and other ESP devices.
Unsure which one you need? Message us before ordering and we’ll help you confirm!
4-Pin Wiring Guide
This guide is only required if you are installing our 4-pin mount to connect with your existing ESP Accessories or Hardwire Kit.
Not using a ESP Accessories? Save time and select our standard 2-pin option instead.
| Pin | Function | Mount | Valentine One |
|---|---|---|---|
| P2 | ESP serial data | Yellow | Black |
| P3 | +12V power | Red | Red |
| P4 | Ground | Black | Green |
| P5 | ESP serial data | White | Yellow |
P2 and P5 both carry bidirectional ESP serial data — both wires are required for V1Driver / YaV1.
Install Guide
30-Day Money-Back Guarantee
Mount it. Drive it. If it’s not right, send it back for a full refund.
Install Steps
Step 01
Clean & Apply
Wipe with isopropyl alcohol, then firmly press the receiver onto the windshield.
Step 02
Connect Power
Wire in the ground loop and connect to a switched 12V source.
Step 03
Drive
Snap your detector arm in and hit the road — you're protected.
Know your mount — 2-Pin vs 4-Pin
2-Pin
Power only - your detector runs and functions as normal. Best for simple hardwire installs.
4-Pin
Power + data - required for the Escort Smart Cord, Uniden Remote Mute Kit or Valentine One ESP accessories.
2-Pin and 4-Pin are not interchangeable — forcing a mismatched connection can damage your detector.
Full 2-Pin vs 4-Pin guide
Frequently asked questions
2-Pin vs. 4-Pin Mounts — What’s the difference?
Are 2-Pin and 4-Pin mounts interchangeable?
No. They are completely non-interchangeable. They use different physical connectors and internal layouts. Mixing components or forcing a mismatched connection can permanently damage your radar detector.
Does my detector still fully function on 2-Pin?
Yes. All on-device features (Mute, Mark, top buttons, display, and audio alerts) work perfectly normal on both versions. "No alert out" simply means the 2-Pin mount cannot send signals to external, separate dash accessories (like a remote mute button or motorcycle helmet link).
Which one do I need?
| Mount Type | Best Used For | Confirmed Models |
|---|---|---|
| 2-Pin (Power Only) | Simple, clean hardwiring (e.g., mirror taps or basic fuse box power) where you just want the detector to power on and function as usual. | Standard power-only setups. |
| 4-Pin (Power + Data) | Required if you are using the manufacturer's factory "smart" hardwire kit with a remote mute button. | Uniden R4 / R7 / R8 / R8NZ, Escort EZ Mag, V1 Gen 2. |
⚠️ Bottom Line: If you want to use a Escort Smart Cord, Uniden Remote Mute Kit or Valentine One ESP Devices and are comfortable with soldering wires get the 4-pin. Otherwise, the standard 2-pin is fine for most users, If still unsure, message us before buying. 😊
When will I get my order?
We will work quickly to ship your order as soon as possible. Once your order has shipped, you will receive an email with further information. Delivery times vary depending on your location.
How do I install the Radar Detector Mount?
The process is super simple and is virtually the same for both Escort and Uniden Detectors.
Click Here for a video tutorial: Video Tutorial
How do I wire up the Powered Receiver
All you need to do is connect the 12V Power source and the negative loop terminal.
Here is a guide to follow.
Where are your products manufactured?
Our products are manufactured both locally from 3D Printed parts and imported electronics. We carefully select our manufacturing partners to ensure our products are high quality and a fair value.
Note: 3D Parts can have slight imperfections. However, they are functionally tested and are tested to work as intended.
How much does shipping cost?
Shipping is calculated based on your location and the items in your order. You will always know the shipping price before you purchase.